Thursday, October 29, 2015

Azure Resource Manager (ARM) Virtual Networks: Move-AzureResource

Quick "Heads Up" to users of Azure.

Azure released their new Azure Resource Manager (ARM) automation engine.


The problem is, some solutions are offered as ARM-only.  If your using the "Classic" Virtual Network you will have to deploy a vNet using ARM to leverage the product.

Long term,  you would want to create a connection between your "Classic" and newly created ARM vNet and use the Move-AzureResource cmdlet to migrate all your resources over.  Then, decommission your "Classic" vNet. 

Additional info regarding the Move-AzureResource cmdlet:
https://msdn.microsoft.com/en-us/library/dn986795.aspx

Monday, August 24, 2015

How to find your KMS Servers. (Key Management Service)

I recently had a need to find our enterprise KMS servers.  Fortunately, this can be easily accomplished by one of the following two methods:

1. Run the following nslookup command:
nslookup -type=srv _vlmcs._tcp

2. On my Windows 8.1 machine,  I ran the following vbs script (included with my load).  This method presents you with a popup window with the KMS server info.
Slmgr.vbs /dlv

Once you have the KMS server, run the following to register your server.
slmgr /skms "kms server Hostname/IP"
slmgr /ato


Done Deal!

Tuesday, August 18, 2015

Rescan Disks option Grayed Out

I recently recieved a request from one of our DBAs to extend a drive on a VM.  No problem right?  We've done it 1000's of times.

The VM was running Windows Server 2012 R2.  I extended out the drive/vmdk in VMware and consoled into the VM.  However, this time, the Rescan Disks option was grayed out. (or grEyed out for all my UK friends)


I was about to give the server a reboot, but decided give the following Powershell command a shot.

update-hoststoragecache


This resolved the issue, I was able to successfully extend the drive.  No reboot required.


May 15th 2018 - Confirmed this works on Server 2016.

Saturday, August 15, 2015

Adobe Flash Player - An ActionScript error has occurred. SecurityError: Error #2060

Recently I've been getting a ton of Adobe ActionScript errors in Internet Explorer:


***Update - Aug 18th 5PM Pacific*** It appears that Microsoft has released a patch sometime today:


You can use Window Update to install the patch or download the patch from the link above.  Fingers crossed:


Bottom line:
Here's the official Microsoft KB regarding this issue:
https://support.microsoft.com/en-us/kb/3087916

As of Aug 18th, this is a known issue with Windows 8.1 and Server 2012 R2. Microsoft is still resolving this issue.  I'm patiently waiting for an update from Microsoft.   Til then, I will continue use Google Chrome...

Additional Details:

Looks like Microsoft and Adobe issued the following Security Advisory on Aug 11th:
https://technet.microsoft.com/library/security/2755801
https://helpx.adobe.com/security/products/flash-player/apsb15-19.html

Then, it appears that Microsoft pushed out the debug version of Adobe Flash by mistake.  Here's what I see on: https://helpx.adobe.com/flash-player.html


I tried various downloads and they do not seem to work (Or they have already been installed. Ex: KB3079777).   Since the Adobe Flash Player is integrated with Internet Explorer in Windows 8,  I can not find an standalone install.


Thursday, August 6, 2015

Azure Site Recovery (ASR) - CS registration with Azure vault has failed. Failed to register DRA. Error code:1.

I've recently started to play with Azure Site Recovery (ASR) to migrate our internal VMware VMs up to Azure.

During the install process, I received the following error: CS registration with Azure vault has failed.
I attempted to register the vault through the configuration server app and was prompted with the following: Failed to register DRA. Error code:1.

According to the logs possible solutions are:

1) Internet connection failure or Invalid/expired vault credentials file. Verify the proxy settings, regenerate the vault credentials file and retry the operation with the updated credentials file.

2) Machine being out of sync from the time zone. Ensure that your current machine time corresponds to the selected time zone.


It turns out, routing wasn't set up to use the ExpressRoute to get to Azure resources.

Troubleshooting: While attempting to register ASR through the config server app, run netstat -na in the command prompt to see if there are any entries with SYN_SENT

Once that was sorted, I was relieved to see:


Tuesday, June 9, 2015

Raspberry Pi 2 - How to install OpenELEC Kodi

*** Update March 5th 2017 - Another option is to use LibreElec to quickly install KODI on your Raspberry Pi.  Quick and easy install.  https://libreelec.tv/downloads/

*** Update Aug 13th 2016 - An easier method of getting KODI installed on your Pi is to use OSMC.
https://osmc.tv/

AKA: How to spend $125 on a $35 computer.

Some of my buddies asked how I set up my Raspberry Pi 2 media center.  So, I figured I do a quick write up.

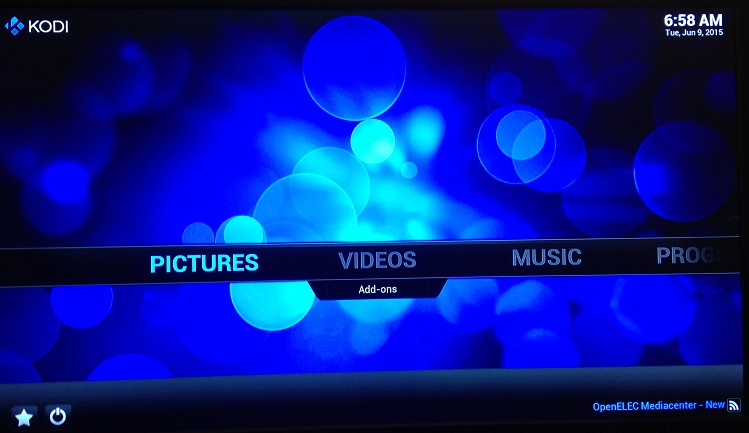
Since this Pi will be used strictly for Media Center duties, I chose to use OpenELEC.  It runs JeOS and quickly transforms your Raspberry Pi into a Kodi media center.

Initially, I was trying to piece together the system using existing parts from my "Boneyard".  However, after pricing out the accessories I still needed, I figured it was easier to purchase the following Vilros starter kit through Amazon.

http://www.amazon.com/Adapter--20-Guide--Clear-Case--Power-Supply--Kingston-Adapter--HDMI/dp/B00MV6TAJI/ref=sr_1_1?ie=UTF8&qid=1433826762&sr=8-1&keywords=vilros+raspberry+pi+2&pebp=1433826763654&perid=0ZXTEMZHGWMNDM8SC45K

Here's a pic of the PI in the Vilros case with Heat Sink Installed.
Alright, lets get started...

1. Insert your SD card into the card reader of your Windows Client.

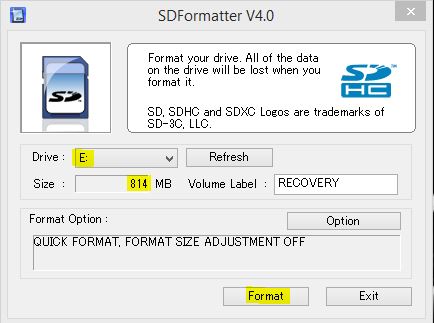
2. Download, extract and run the setup of SD Formatter 4.0.
https://www.sdcard.org/downloads/formatter_4/index.html

3. **Confirm you have selected the appropriate drive containing the SD Card to be formatted before proceeding** 

Launch SD Formatter and select the appropriated drive. Click Format.

Note: The card provided in the kit shows up as only 814MB.  Don't worry, 7.41GB will be recognized after formatting.


4. Download the Raspberry Pi Build of OpenELEC from the following link (Make sure you download the correct Disk Image for your model of Pi):

http://openelec.tv/get-openelec

Use 7-Zip to extract the GZ file.

5. Download, install and launch. Win32 Disk Imager:
http://sourceforge.net/projects/win32diskimager/

Select the OpenELEC .img file and Device.  Then select Write.

**One again, confirm you have selected the appropriate Device**


6. Eject your newly imaged SD card and insert it into your Raspberry Pi 2.  Power on your Pi.

7. Go through the OpenELEC setup wizard. 


8. To setup your wifi:  

System > OpenELEC > Network > Wireless Networks - Active

9. To connect to your Wifi:

 System > OpenELEC > Connections > Conect to your Wifi network.

10. Set your time:

System > Settings > Appearance > International.  Select the appropriate Timezone country and Timezone. 

11.  That's it, the basic setup is now complete.   Now install some great Add-Ons!


Sunday, May 17, 2015

Getting Started with Azure Powershell

I've been working with the Azure management and preview portal for a while now.  I figured its time for me to start leveraging Azure Powershell! 

Here are the basic steps I used to get started:

1. Download and install the Azure PowerShell modules using the Web Platform Installer 5.0:
http://www.microsoft.com/web/downloads/platform.aspx


2. Launch Azure Powershell (I used Windows PowerShell ISE) and connect to your subscription using Azure AD authentication (preferred method for logging in). 

Add-AzureAccount

A sign in window will pop-up where you will supply your AD credentials.  After a successful log-in you will get a message with your subscription(s) information.

3. Once you've successfully logged in, you can run some simple commands:

Get-AzureAccount
Provides a summary of the subscriptions associated with the account.

Get-AzureSubscription:
Provides a dump of subscriptions you have access to

Select-AzureSubscription:
Selects current subscription
Select-AzureSubscription "Subscription Name" (Caps Sensative)

Get-AzureRoleSize
How to find Azure VM sizes. 

Start-AzureVM 
Start-AzureVM -ServiceName "MyCloudService" -Name "MyVM"

Get-AzureVM 
Retrieve info about an Azure VM
Get-AzureVM -ServiceName "MyCloudService" -Name "MyVM"
Get-AzureVM -ServiceName "MyCloudService" -Name "MyVM" | Select IpAddress

Stop-AzureVM 
-Force releases the public, and VIP associated with the could service
Stop-AzureVM -ServiceName "MyCloudService" -Name "MyVM" -Force

Remove-AzureVM
-DeleteVHD deletes VHDs assocated with the VM
Remove-AzureVM -ServiceName "MyCloudService" -Name "MyVM" -DeleteVHD
 
Remove-AzureDisk
Deletes VHDs
Remove-AzureDisk "DiskName" -DeleteVHD 

Remove-AzureService
Removes Cloud Service 
Remove-AzureService -ServiceName "MyCloudService" 
  
Get-Help Azure
Lists all cmdlets in the Azure module

Convert-VHD
Converts from vhdx to vhd format
Convert-VHD –Path c:\VHDs\MyVM.vhdx –DestinationPath c:\VHDs\MyVMVHD.vhd
  
Add-AzureVHD
Migrates local VHDs to Azure.  This cmdlet is aware of empty space.
Add-AzureVHD -Destination "https://MyStorage.blob.core.windows.net/vhds/MyVHD.vhd" -LocalFile Path X:\MyVMs\VHDs\MyVM.vhd -NumberOfUploaderThreads 5


Add-AzureDisk
After uploading your VHD to Azure storage, it must then be tagged as an Azure disk
Add-AzureDisk -OS Windows -MediaLocation "https://MyStorage.blob.core.windows.net/vhds/MyVHD.vhd"-diskname "MyDiskName


Additional Azure SDKs and Command-Line tools:
http://azure.microsoft.com/en-us/downloads/#cmd-line-tools

Thursday, May 14, 2015

Microsoft Virtual Machine Converter (MVMC) - "The Certificate With Thumbprint was not found in the personal certificate store"

Recently, I've been testing the Microsoft Virtual Machine Converter 3.0/3.1 product to push VMs up to Azure.   Upon entering the Subscription ID and Cert Thumbprint, I would get the following error:

"The Certificate With Thumbprint <thumbprint> was not found in the personal certificate store"

I used the typical method of creating a Azure management cert (makecert - in Windows SDK)


makecert -sky exchange -r -n "CN=MyCert" -pe -a sha1 -len 2048 -ss My "MyCert.cer"
 

Turn out, I had the cert in the my personal store, but it needed to be imported into Trusted Root Certification Authorites:


Instructions on Exporting and Importing the cert into the appropriate folder is located in the following Microsoft KB:

https://support.microsoft.com/en-us/kb/2977336?wa=wsignin1.0