In a perfect world, all Hyper-V instances would be running on a Guarded Fabric with Host Guardian Service and Shielded VMs enabled. Unfortunately, for smaller environments and branch offices this may be overkill or cost prohibitive.
This is specially true given that Windows Server 2016 -
Datacenter Edition is required for Shielded VMs.
That said, to add a layer of protection to your Server 2016 VMs, you can enable vTPM and Bitlocker. With Windows Server 2016 Hyper-V, you can enable a Virtual Trusted Platform Module 2.0 (vTPM) on a VM. The cool thing is, the physical Hyper-V host does
NOT need to have TPM.
With the vTPM now enabled, you can enable BitLocker within your VM. The VM can how be placed in a Remote Office or hosted infrastructure without worrying about the VM files being stolen or copied.
Lets get started:
1. Gracefully shutdown the VM and enable vTPM
2. Power on the VM and confirm that the vTPM has been installed.
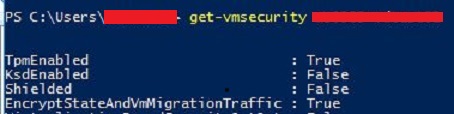
Alternatively, you can run the following command on the host running the VM:
get-vmsecurity myvm
3. Enable BitLocker within the VM by running the following command:
Install-WindowsFeature -Name BitLocker -IncludeAllsubfeature -IncludeManagementTools
Restart the server.
4. Enable BitLocker within the VM
Testing:
1.
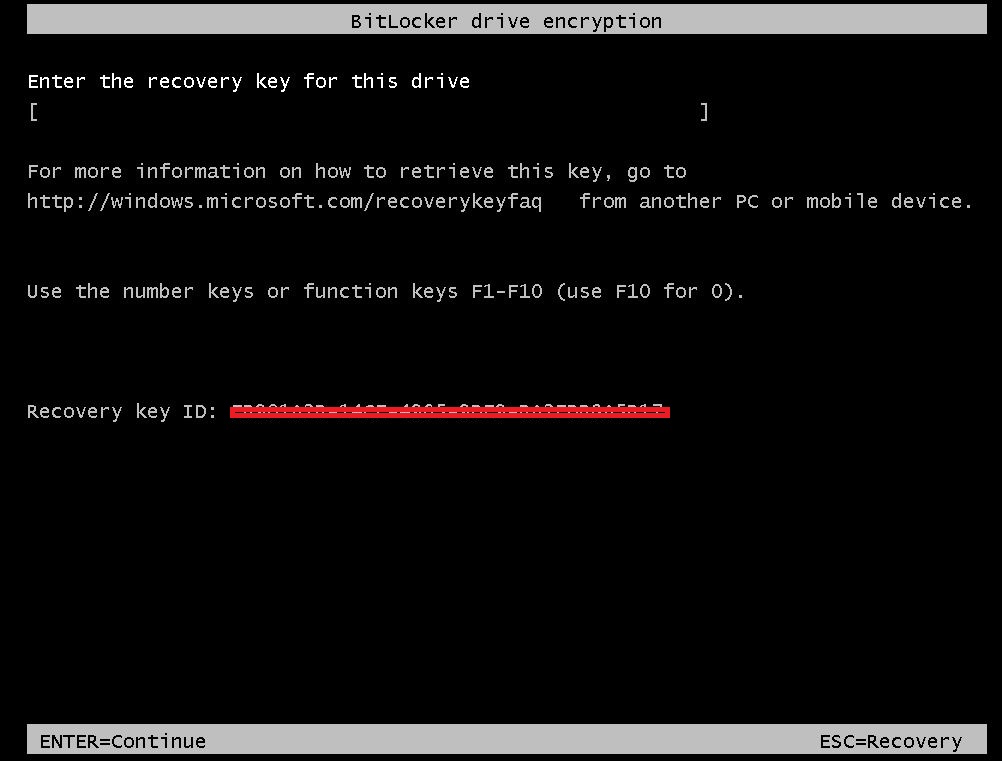
The vhdx was
copied to another instance of Hyper-V . A fresh
VM has created around this vhdx file. Upon
power on, it requested the recovery Key. The Key was entered and the Vm started up as expected.
2. Next, the e
ntire VM folder was copied to another Hyper-V instance. The Import Virtual Machine option was used.
“Register the virtual machine in-place (use the existing unique ID)”
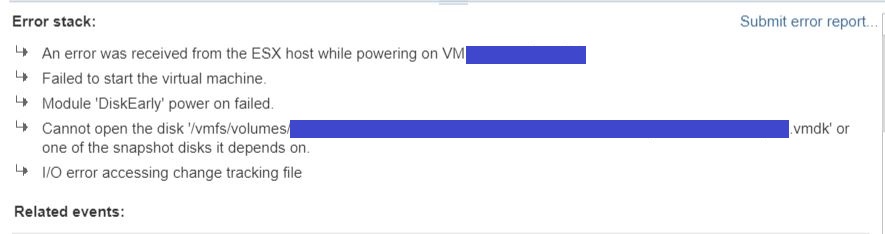
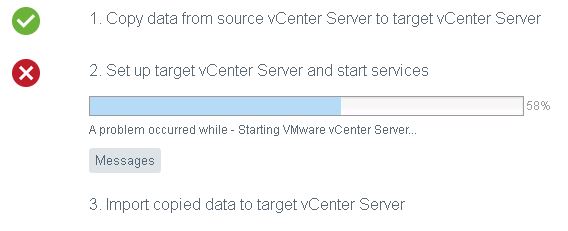
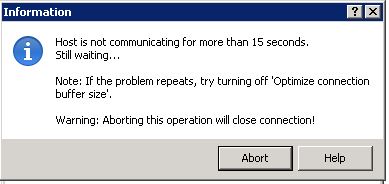
selected. I received the following error
and it immediately powered off.
3. Finally, I attached the vhdx to the host running the VM and placed it online.
I was unable to access the contents of the drive.
Additional Notes: In the event that a
VM needs to permanently move hosts, I confirmed that turning Bitlocker off,
enabling vTPM, then re-enabling BitLocker allowed the VM to boot up normally.